The hood on a z32 is a thing of beauty - wide, low, sleek and slung. Over the years, the hood can develop metal fatigue and the latch can get some slop in it. This causes the hood to get noisy, squeaking and rattling over bumps, and even at idle. Another common problem is that these cars have been improperly jacked or lifted by the lower radiator support bracket. This pushes up the hood from underneath.
These cars are amazingly tight to start with, and with a little attention, they can stay snug and rattle free well after 100K miles.
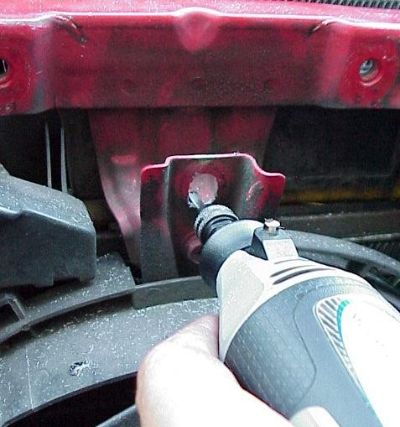
Special Tools: a rotary grinding tool, such as a Dremel, with a metal cutting bit
Difficulty: maybe a 1.5 out of five, pretty dang easy (as are most of my write-ups since I have limited mechanical abilites, lolam)
Time Needed: couple of hours to do everything, longer if the lower radiator support bracket is bent

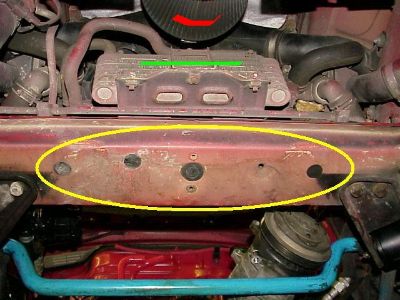 The is the radiator lower support bracket circled in yellow, as viewed from under the car, front of car is at top. Red line is on cone air intake. The is the radiator lower support bracket circled in yellow, as viewed from under the car, front of car is at top. Red line is on cone air intake.
The green line is on the oil cooler in front of the radiator. Ignore the A/C compressor resting on the blue sway bar, the engine is out of the car. the above pic is a normal looking bracket, that has not been bent or deformed by improper jacking.
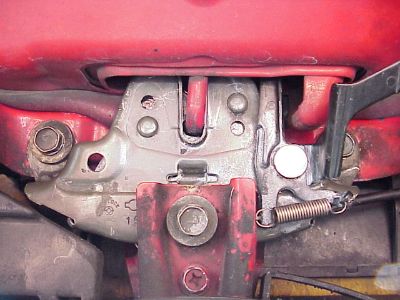
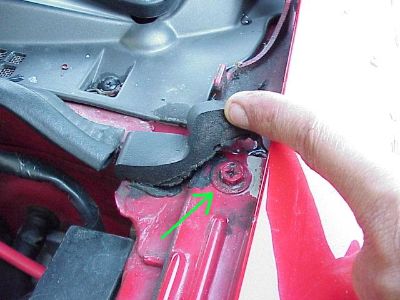
To an ignorant mechanic, the radiator support bracket may look like a crossmember that could be used to jack the Z up in the air. Besides being dangerous, the bottom bolt on the hood latch is directly connected to the radiator support bracket by a long vertical bracket, as shown below.
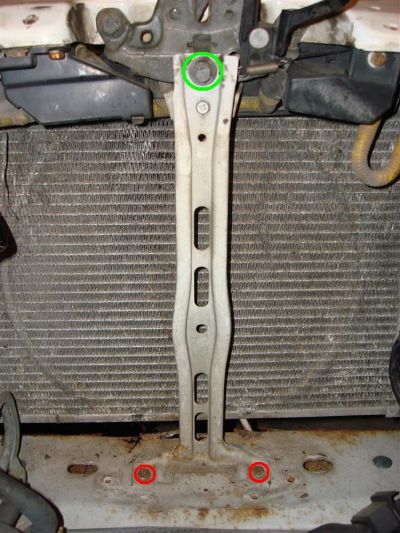 The bolts circled in red are sitting on top of the radiator support bracket. The bolt circled in green is connected to the hood latch. To get to this view, everything in front of the bracket needs to be removed. This included the front fascia, air intake, oil cooler, and electric fan. The bolts circled in red are sitting on top of the radiator support bracket. The bolt circled in green is connected to the hood latch. To get to this view, everything in front of the bracket needs to be removed. This included the front fascia, air intake, oil cooler, and electric fan.
Picture credit: Andy Turpen
The above pic clearly shows how the hood latch is connected to the radiator support bracket. So if the car was jacked up by the radiator support bracket, the hood latch above gets pushed upward and then the hood is also forced up and out of alignment. If the hood edges are not flush with the fender panels, then the radiator support bracket should be checked first, and straightened before going thru the rest of the steps listed here.
Straightening the radiator support bracket is done by removing the front fascia, air intake, oil cooler, electric fan and the long vertical hood latch bracket . Then brute force is applied with a large rubber mallet, pounding on area where the vertical bracket is attached to the radiator support bracket, forcing it back down. A piece of wood helps. Pound on the wood and put the wood on the radiator support bracket.

Most of the time a hood squeak is coming from the latch. There is some adjustment built into the latch, but not enough. In the first pic, the stock latch is already adjusted as far down as it will go. Therefore, the mounting holes need to be enlarged.
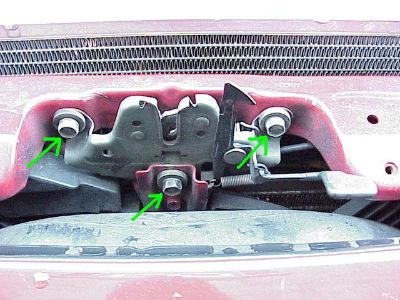 Here is the latch and the three 12 mm bolts that need to be removed. The holes through which the bolts pass need to be enlarged. The two upper holes are on the latch itself. Here is the latch and the three 12 mm bolts that need to be removed. The holes through which the bolts pass need to be enlarged. The two upper holes are on the latch itself.
The bottom hole is through a long vertical bracket that all the way down the length of the radiator and is attached to the lower radiator support bracket, as discussed above.
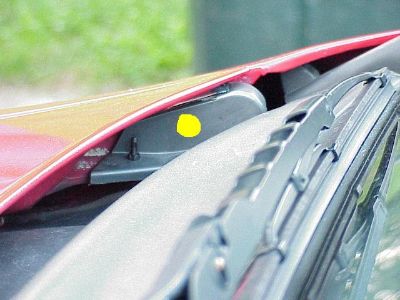
The rubber T air intake has to removed to make room for grinding the bottom hole of the hood bracket. I have a single, cone type air filter. The easiest way to remove the intake is to leave the cone air filter attached to the rubber intake T piece. First, disconnect the wire connected to the Mass Airflow Sensor (MAS) shown by the blue arrow. Then undo the clamps by the red arrows, and remove the bolt holding the air filter cap to the splash shield. Lift the entire intake out as a single unit.

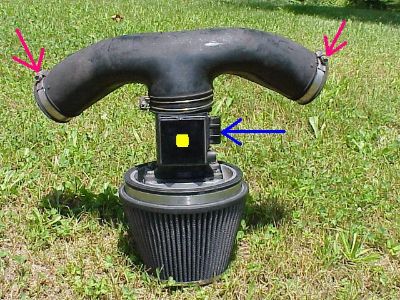 The yellow dot is on the Mass Airflow Sensor (MAS). The yellow dot is on the Mass Airflow Sensor (MAS).
With the T-intake out of the way, enlarge the lower mounting hole on the latch bracket by slightly lengthening it downward.
 Lengthen the BOTTOM edge of the hole only, a few millimeters. The amount of downward adjustment that can be gained is limited by the body of the latch. I suggest a couple of trial fits with the latch held in place during the grinding. Lengthen the BOTTOM edge of the hole only, a few millimeters. The amount of downward adjustment that can be gained is limited by the body of the latch. I suggest a couple of trial fits with the latch held in place during the grinding.
I used a tungsten carbide cutter #9901 in my Dremel.
Enlarge the UPPER portions only of the two mounting holes on the latch next. Here is the way the latch looked AFTER I finished grinding the two holes shown by the green arrows.
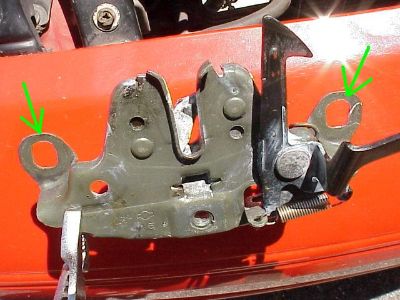 There is not a lot of extra room on these holes, so don't grind off too much metal. You can always take more off but you can't put it back. The white looking stuff is spray lithium grease. There is not a lot of extra room on these holes, so don't grind off too much metal. You can always take more off but you can't put it back. The white looking stuff is spray lithium grease.
Grinding the holes with latch still attached to the car by its cable is possible. If you choose to do it by this "lazy" method, stuff rags into the metal air intake tubes so that metal shavings don't fall into them. Better to remove the latch from the car completely. That way, you can also give it a good soaking in degreaser and clean it up with a wire brush.
I reinstalled the latch as far down as it would go, which is only a few more millimeters than before because the bottom of the latch ends up sitting on the mounting bracket. Still, that seemed to do the trick.
Reinstall the latch and close the hood for inspection, before the nose panel and intake are put back on.
 Now is the time to do any fine tuning of the latch position. I just tapped mine as far down as it would go. The catch on the hood appears to be side-bent to the left a bit, but it worked perfectly. Now is the time to do any fine tuning of the latch position. I just tapped mine as far down as it would go. The catch on the hood appears to be side-bent to the left a bit, but it worked perfectly.
The factory service manual states the hood should be adjusted so that it sits one to 1.5 millimeters below the fenders. Then adjust the rubber hood bumpers on the corners to bring the hood even with the fender. Sometimes a Z car has been jacked improperly by the lower radiator mount under the front of the car. This can push the entire latch and hood up to a point where it cannot be adjusted unless the radiator mount is bent back into place.
The latch is 99% of the battle, but more can be done. Specifically, the bumper stops should be replaced and adjusted, and the hood hinges should be tightened and lubricated.
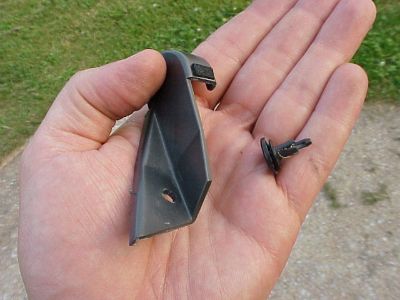
Inspect the condition of the rubber hood bumper stops on the front corners of the engine bay. If they are original, they will need replacing. The black arrow points to a new one installed on the driver's side. The service manual states that the free height of the rubber bumpers should be aproximately 15 millimeters.
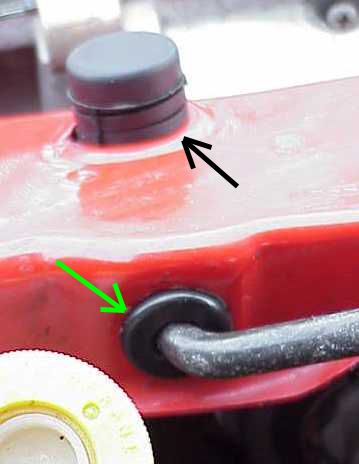 The green arrow points to a grommet that goes around the hood strut bar. This hard plastic piece has often crumbled and disappeared. The hood strut bar can make quite a rattle without it, so the grommet deserves inspection. The green arrow points to a grommet that goes around the hood strut bar. This hard plastic piece has often crumbled and disappeared. The hood strut bar can make quite a rattle without it, so the grommet deserves inspection.
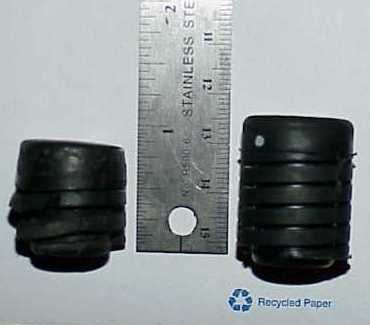 Here is one of my old, squashed, hood bumpers on the left, and a new, replacement one on the right. Here is one of my old, squashed, hood bumpers on the left, and a new, replacement one on the right.
| part no. | description | aprox. price | | 65722-30P10 | grommet for hood prop bar | $3.00 | | 65822-01M00 | hood bumper stop | $6.00 |
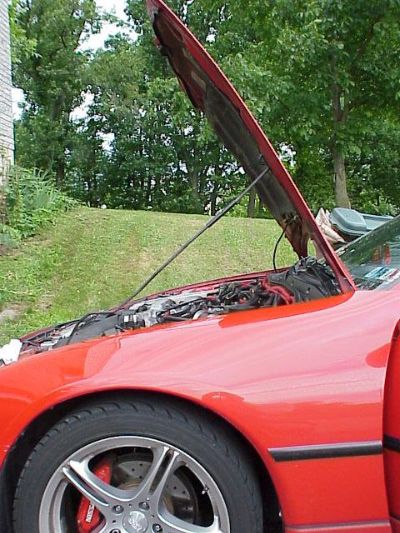 Open the hood into the furthest position, as shown. You already knew that you could open the hood wide and WIDER, right? The strut bar has to be wiggled a bit to get it into this position. Open the hood into the furthest position, as shown. You already knew that you could open the hood wide and WIDER, right? The strut bar has to be wiggled a bit to get it into this position.
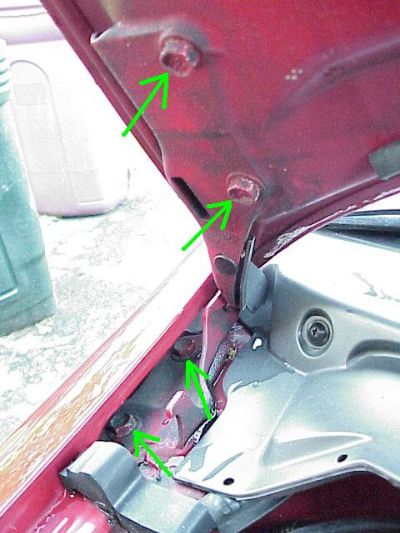 There are four, 12 mm body bolts on each hood hinge. The top two are easily accessible. The fender has to be loosened to get to the bottom two body bolts. There are four, 12 mm body bolts on each hood hinge. The top two are easily accessible. The fender has to be loosened to get to the bottom two body bolts.
 The fenders do not have to be removed, just loosened enough to gain access to the bottom hinge bolts on the hood. Open the doors as far as they will go and remove these 12mm fender bolts on both sides. You may want to pad your socket extension so that you don't scratch any paint. The fenders do not have to be removed, just loosened enough to gain access to the bottom hinge bolts on the hood. Open the doors as far as they will go and remove these 12mm fender bolts on both sides. You may want to pad your socket extension so that you don't scratch any paint.
 Remove the four fender bolts that run along the length of each fender under the hood. The first bolt may be hidden under a small piece of foam insulation. The foam helps pad the hood and makes a noticeable difference in sealing the engine noise. Remove the four fender bolts that run along the length of each fender under the hood. The first bolt may be hidden under a small piece of foam insulation. The foam helps pad the hood and makes a noticeable difference in sealing the engine noise.
If these foam pieces are missing in action from your Z, then I recommend replacing them with some foam weather stripping. Nissan charges $18 a piece for them and that is simply too much for small pieces of foam rubber, IMHO.
Once the fender bolts are removed, gently pry the fender outward next to the hinge. This will allow a socket to slip straight down onto the hinge body bolts in the engine bay. All eight hinge bolts on my car took at least a half-turn to snug.
In order to properly grease the hinges, the hinge covers must be removed. Does your Z still even have its hinge covers? I replaced mine with new ones when I did my cowling.
 The yellow dot is on the passenger side hinge cover. When removing or installing the hinge cover, the hood should be open to its widest setting. The yellow dot is on the passenger side hinge cover. When removing or installing the hinge cover, the hood should be open to its widest setting.
 Here is the driver side hinge cover, removed. The small plastic fastener on the right comes apart in two pieces. Here is the driver side hinge cover, removed. The small plastic fastener on the right comes apart in two pieces.
| part no. | description | aprox. price | | 65451-30P00 | driver hood hinge cover | $7.25 | | 65450-30P00 | passenger hood hinge cover | $7.25 |
Next, inspect the underside of the hood. Look for any shiny, metal spots that would indicate metal rubbing on metal. You may find an unexpected surprise, like this:
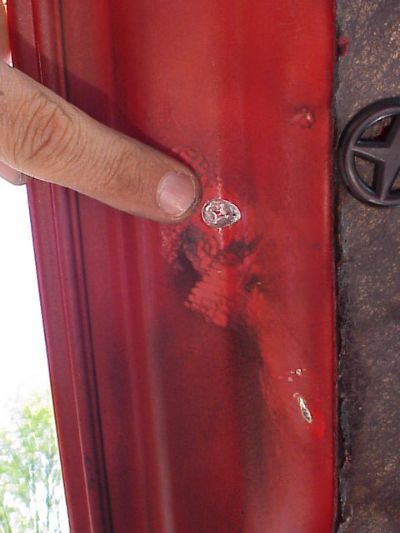 One can clearly see the shape of a Phillips screw head imprinted on the underside of the hood. When I closed the hood and pressed over this area, there was a very noticeable rattle. I inspected a Z the other day and it was making contact in the same area. One can clearly see the shape of a Phillips screw head imprinted on the underside of the hood. When I closed the hood and pressed over this area, there was a very noticeable rattle. I inspected a Z the other day and it was making contact in the same area.
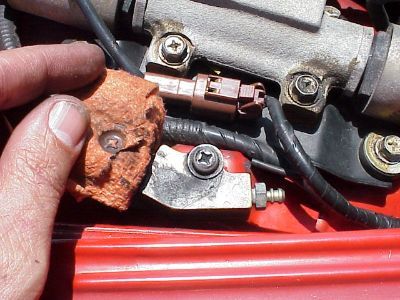 The clutch bleeder screw on the passenger side was the culprit. I tried to pad the screw head with a rag, but that didn't help. The clutch bleeder screw on the passenger side was the culprit. I tried to pad the screw head with a rag, but that didn't help.
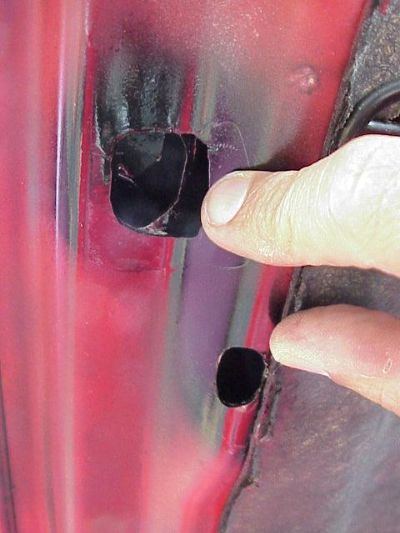 So I decided to make cut-outs under the hood at the contact points. There are lots of cut-outs already under the hood, so another one or two didn't bother me. Protect the engine bay from the metal filings with a drop cloth. So I decided to make cut-outs under the hood at the contact points. There are lots of cut-outs already under the hood, so another one or two didn't bother me. Protect the engine bay from the metal filings with a drop cloth.
Instead of cutting a hole in the underside of the hood, I later on decided to delete the entire bleeder under the hood.
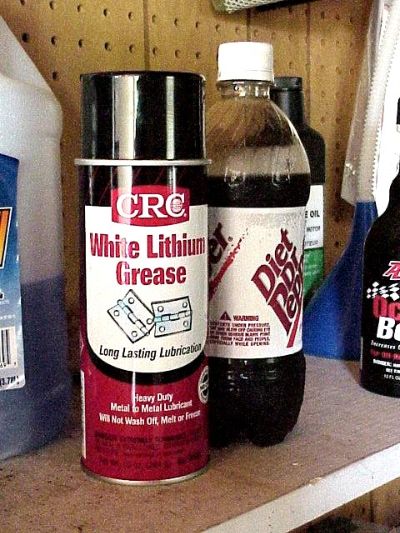
The lubricant of choice for latches and hinges anywhere on the car is white lithium grease. And yes, the diet soft drink of choice is Dr. Pepper.
In addition to the measurements listed in the service manual, I adjusted my hood such that it would shut fully from it's own weight when dropped from a height of 12-18 inches,with just the right "ka-chunk" sound. That's just me :c)
|