This write up shows how to temporarily and quickly hook up an aftermarket boost or turbo gauge for measuring boost pressure. I do not have any aftermarket gauges installed inside my Z. I like keeping the stock appearance of my interior. However, when modding my car and turning up the boost, especially during my new turbo install, having an accurate measure of boost pressure was critically important. The stock boost gauge was considered to have a wide margin of error, although my stock gauge proved to be very close to actual pressure.
So far, I have resisted peer pressure to install an electronic boost controller (EBC). I first used boost jets, or welding tips to block the opening pressure of the waste gate hoses on my stock turbos. I needed to be able to verify my boost pressure with an aftermarket gauge. I liked not having the extra complexity and connections of an EBC. Boost creep was never an issue for me. I kept a margin of safety built into the maximum boost pressure that I am willing to run.
Even with supporting mods such as my aftermarket intake, exhaust, ECU chip, injectors, and intercoolers, there was not much sense in pushing my stock turbos beyond 15 psi.
Later, when I upgraded my turbos and installed a Hallman manual boost controller, an accurate measure of boost pressure was again critical. So I this gauge to set up to adjust my boost, then I remove the gauge.
I don't run my boost pressure so close to the edge of the limits of my mods that a couple of PSI are going to damage my engine. Boost is boost, and the engine doesn't care how the positive intake pressure is being delivered as long as it's reliable and reproducible.
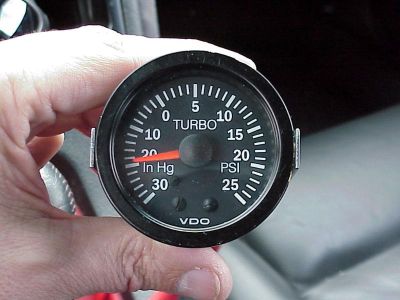
I bought a VDO turbocharger gauge model # 150 121 off of the Internet, listed at 2 1/16" diameter. The size of the gauge was not important to me since I did not plan to permanently mount it. Expect to pay around $30 for a new gauge without any tubing.
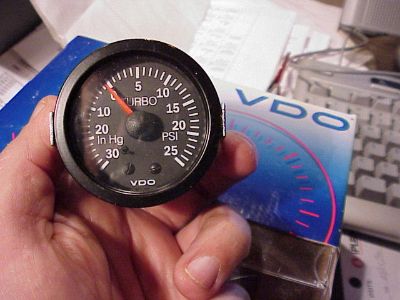 Gauge read from minus 30 inches of Hg vacuum to plus 25 psi of boost pressure. Gauge read from minus 30 inches of Hg vacuum to plus 25 psi of boost pressure.
 The trick for me was how to get the round brass male fitting on the back of the gauge hooked up to the manifold pressure under the hood. The trick for me was how to get the round brass male fitting on the back of the gauge hooked up to the manifold pressure under the hood.
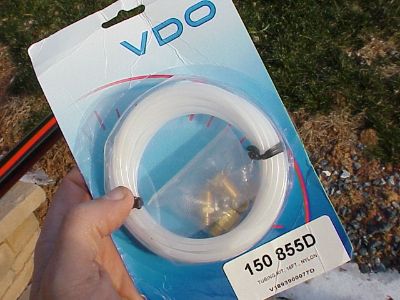
Before figuring out an easier way to connect the gauge, I wasted $22 on this tubing kit.
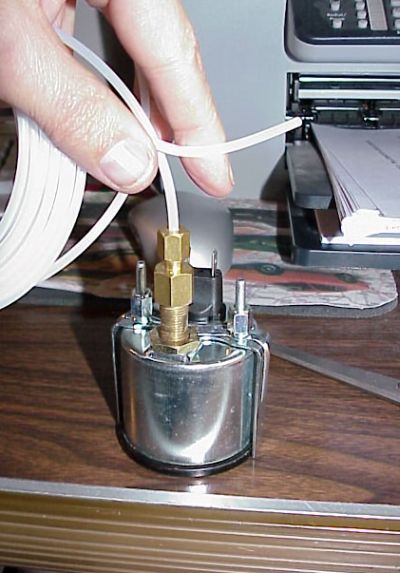 Kit hooked up to back of gauge. Kit hooked up to back of gauge.
The next pic is under the hood and shows the vacuum nipple I used as my source for the boost pressure gauge. This nipple took a six millimeter vacuum line.
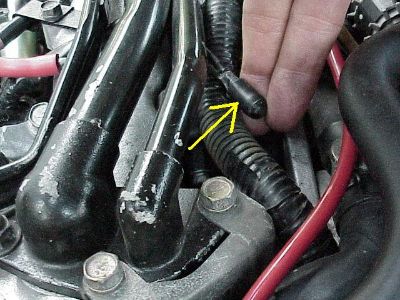 This nipple was off the rear of the balance tube, driver side, and was already freed up and capped as a result of my carbon canister removal. This nipple was off the rear of the balance tube, driver side, and was already freed up and capped as a result of my carbon canister removal.
If there is still a vacuum line attached to the above nipple, temporarily disconnect the hose, put a screw in the hose end to seal any vacuum leak, and then just hook the hose back up to the nipple when done measuring the boost pressure. Better yet, delete the carbon canister which got rid of the hose completely.
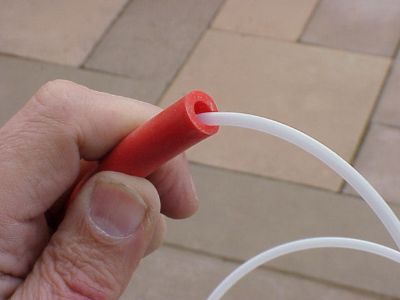 Here's the problem. The six mm vacuum hose coming from under the hood did not mate up at all to the smaller white plastic tubing coming from the back of the gauge. Can you say air leak? Here's the problem. The six mm vacuum hose coming from under the hood did not mate up at all to the smaller white plastic tubing coming from the back of the gauge. Can you say air leak?
The next pic represented my first attempt and is NOT the way I recommend connecting the gauge, but it did work. These were the pieces I already had lying around my garage, before I decided I needed to go to the hardware store.
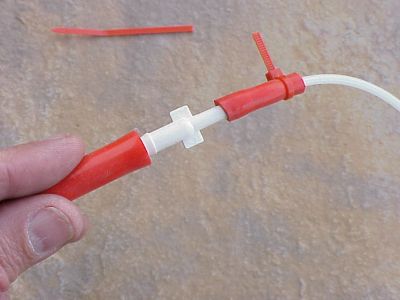 I spliced the six mm hose to a smaller hose, then the smaller hose made a tighter seal around the white plastic tubing with a small plastic cable tie. I spliced the six mm hose to a smaller hose, then the smaller hose made a tighter seal around the white plastic tubing with a small plastic cable tie.
The white plastic piece in between the two pieces of red hose above is a vacuum connector that stepped down the size of the six mm hose.
The above splice worked but I was not happy with the integrity of the connections, too many potentials for leaks. Also, the white plastic tubing was very stiff and hard to manipulate, particularly for a temporary install.

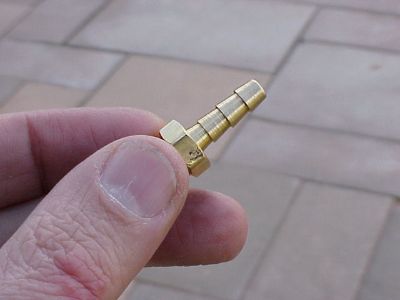 Take your boost gauge with you to the plumbing section. Find a barb connector that will screw onto the back of the gauge and then take a six mm hose. Take your boost gauge with you to the plumbing section. Find a barb connector that will screw onto the back of the gauge and then take a six mm hose.
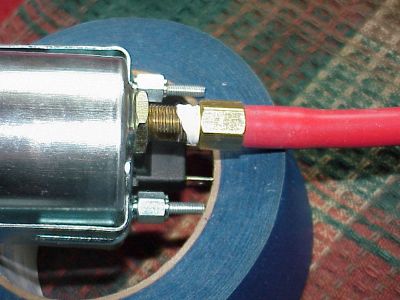 With the connector installed on the back of the gauge, the red vacuum tubing slipped easily over the barb fitting. Obviously, this was a much cleaner connection. I put white Teflon tap around the threads of the gauge. With the connector installed on the back of the gauge, the red vacuum tubing slipped easily over the barb fitting. Obviously, this was a much cleaner connection. I put white Teflon tap around the threads of the gauge.
 Here is the other end of the hose connected to the balance tube under the hood. I recommend using silicone hose because it is so pliable and easy to work with. Here is the other end of the hose connected to the balance tube under the hood. I recommend using silicone hose because it is so pliable and easy to work with.
This is how I threaded the hose under the hood and to the driver's side window. The balance tube connection is to the left of the picture. Obviously, the driver's window has to be at least cracked open. The hood can be closed tight.
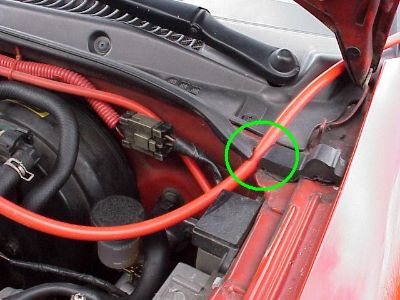 The circle shows a natural space between the foam hood gaskets for the tubing to exit from the engine bay. The circle shows a natural space between the foam hood gaskets for the tubing to exit from the engine bay.
 Here is the gauge inside my car, with the engine iding, showing ~20 inches of negative mercury vacuum pressure. Here is the gauge inside my car, with the engine iding, showing ~20 inches of negative mercury vacuum pressure.
For safety purposes, when checking for maximum boost have a passenger read the gauge since this will require WOT (wide open throttle) runs in third and fourth gears. Do not take your eyes off the road under those conditions.
Takes less than two minutes to disconnect the gauge when I am done and to recap the balance tube nipple, until the next time I want to measure my boost.
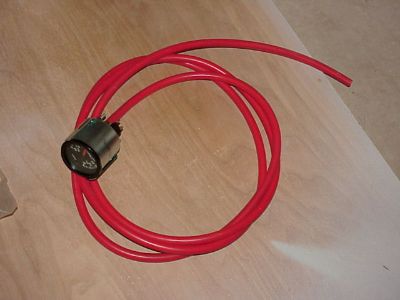 This is how I store the gauge so I don't have to go hunting for five feet of silicone tubing every time. This is how I store the gauge so I don't have to go hunting for five feet of silicone tubing every time.
|