First remove the windshield washer reservoir to make room for working on the brake master cylinder (BMC).
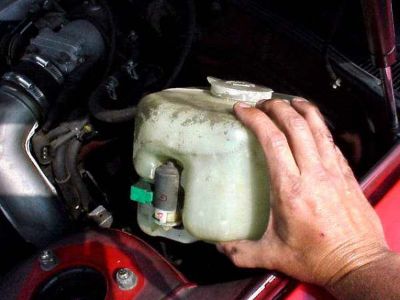 Windshield washer reservoir lifts out after disconnecting two hoses and three electrical connectors underneath. Mark which ones go where. I took this opportunity to seal the washer motors at the tank with black RTV silicone. Windshield washer reservoir lifts out after disconnecting two hoses and three electrical connectors underneath. Mark which ones go where. I took this opportunity to seal the washer motors at the tank with black RTV silicone.
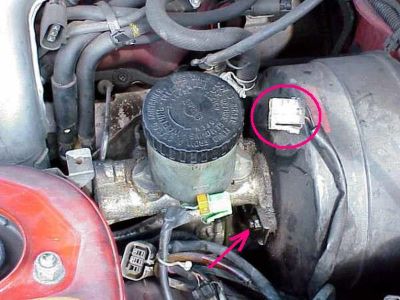 Easy access to the BMC with the windshield washer reservoir out of the way. Red arrow shows one of the two 12mm bolts that must come loose to remove the BMC from the vacuum assist servo. Easy access to the BMC with the windshield washer reservoir out of the way. Red arrow shows one of the two 12mm bolts that must come loose to remove the BMC from the vacuum assist servo.
 I used a baster to suck out the old brake fluid from the reservoir before removing the BMC. They can be bought for a buck at the Dollar store. I used a baster to suck out the old brake fluid from the reservoir before removing the BMC. They can be bought for a buck at the Dollar store.
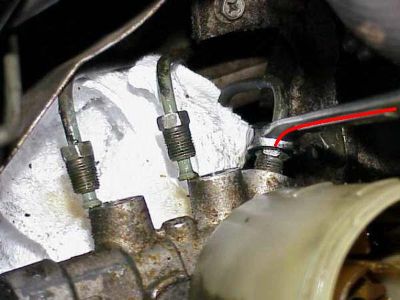 Eight millmeter flare nut wrench on rear brake line at master cylinder. The front two brake lines are already disconnected. Rag underneath catches dripping brake fluid. Eight millmeter flare nut wrench on rear brake line at master cylinder. The front two brake lines are already disconnected. Rag underneath catches dripping brake fluid.
Always use a flare nut wrench on brake and clutch lines or you risk stripping the nut.
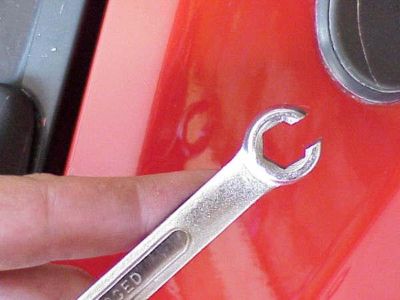 This is a flare nut wrench. Slips over the brake line then slides down onto the flare nut. This is a flare nut wrench. Slips over the brake line then slides down onto the flare nut.
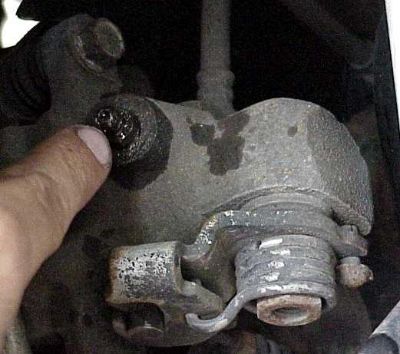
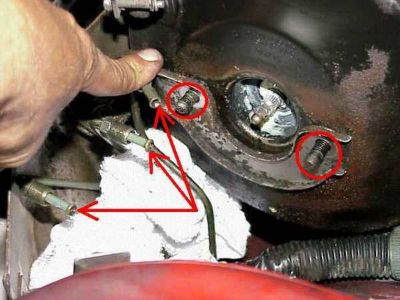 Brake master cylinder removed. Arrows point to the three brake lines that were attached to the BMC. Circles around the mounting bolts for the BMC to the vacuum assist servo. Fresh white lithium grease on spindle between circles. Brake master cylinder removed. Arrows point to the three brake lines that were attached to the BMC. Circles around the mounting bolts for the BMC to the vacuum assist servo. Fresh white lithium grease on spindle between circles.
The bracket on top of the studs above is part of a heat shield that can also be seen under my hand and behind the brake lines.
Fill the new BMC reservoir with fluid and put the top of before installation. Technically, a bench bleed should be performed before installing the new BMC.
When reinstalling the new BMC, start threading the brake lines before tightening the two mounting nuts. Some brake fluid will leak during the installation, but it should be slow. Don't let the level in the reservoir drop below the minimum line.
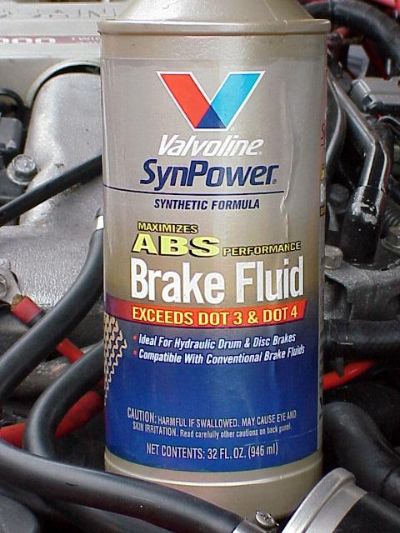
I used this brake fluid which is more than good enough for the street.
My old brake fluid was black, and may have been original vintage 1987 fluid. I bled each wheel until the fluid turned clear. Took the whole bottle.
 New BMC installed. Red arrow shows the electrical connector that detects low brake fluid level. New BMC installed. Red arrow shows the electrical connector that detects low brake fluid level.
 Left rear brake bleeder nipple. There is a nipple behind each wheel. I had my car on a lift. You need two people to bleed the brakes - one on the brake pedal and one opening and closing the bleeder valves. I don't like speed bleeders that allow one person to bleed the brakes, but some peeps love them. Left rear brake bleeder nipple. There is a nipple behind each wheel. I had my car on a lift. You need two people to bleed the brakes - one on the brake pedal and one opening and closing the bleeder valves. I don't like speed bleeders that allow one person to bleed the brakes, but some peeps love them.
|